Basic Setup
This document is a step-by-step guide on VoIP setup at home or the office. For calls to the PSTN you need to have a SIP provider like voip.ms or did.logic.com.
Content
Requirements
This tutorial assumes the following:
- Two SIP phones connected to the same LAN
- A fresh installation of Routr
- SIP providers such as
voip.msordid.logic.com
Setting up the Server
A set of sample configuration covering this scenario is available in the Github repo. You might overwrite the files in the config folder if you wish to skip this section.
Configuring the Gateway
To configure the Gateway, you must consult your SIP provider and obtain the credentials and registration host. The key fields for the configuration are metadata.ref, spec.regService.host and spec.regService.credentials. Here is an example:
- apiVersion: v1beta1
  kind: Gateway
  metadata:
    name: Provider Inc
  spec:
    host: sip.provider.net
    credentials:
      username: 'youruser'
      secret: 'yoursecret'
    transport: udp
Configuring the Number
To configure your Number or virtual number, you must open and edit the file config/numbers.yml. Notice in the example below, how your reference the Gateway by using the field metadata.geRef. The key field while configuring Numbers are spec.location.telUrl and spec.location.aorLink. Keep in mind that the value in spec.location.telUrl must be formatted, precisely, as sent by the provider.
- apiVersion: v1beta1
  kind: Number
  metadata:
    gwRef: gweef506
    geoInfo:
      city: Columbus, GA
      country: USA
      countryISOCode: US
  spec:
    location:
      telUrl: 'tel:17066041487'
      aorLink: 'sip:1001@sip.local'
Creating a new Domain and EgressPolicy
Routr is a Domain centric SIP Server. A Domain is used to group several Agents in the same context. The Domain URI can be an arbitrary name, but we recommend using a fully qualified domain name (FQDN). You also need to configure an EgressPolicy to allow calls outside the Domain. Here is how the file config/domains.yml needs to look like:
- apiVersion: v1beta1
  kind: Domain
  metadata:
    name: Local Office
  spec:
    context:
      domainUri: sip.local
      egressPolicy:
        rule: .*
        numberRef: dd50baa4
Creating the Agents
We now create the Agents 1001 and 1002. Keep in mind that field spec.credentials.username can be alphanumeric, so john or john001 is also acceptable.
Pay close attention to the credentials block since it contains the username and secret for both Agents.
- apiVersion: v1beta1
  kind: Agent
  metadata:
    name: John Doe
  spec:
    credentials:
      username: '1001'
      secret: '1234'
    domains: [sip.local]
- apiVersion: v1beta1
  kind: Agent
  metadata:
    name: Janie Doe
  spec:
    credentials:
      username: '1002'
      secret: '1234'
    domains: [sip.local]
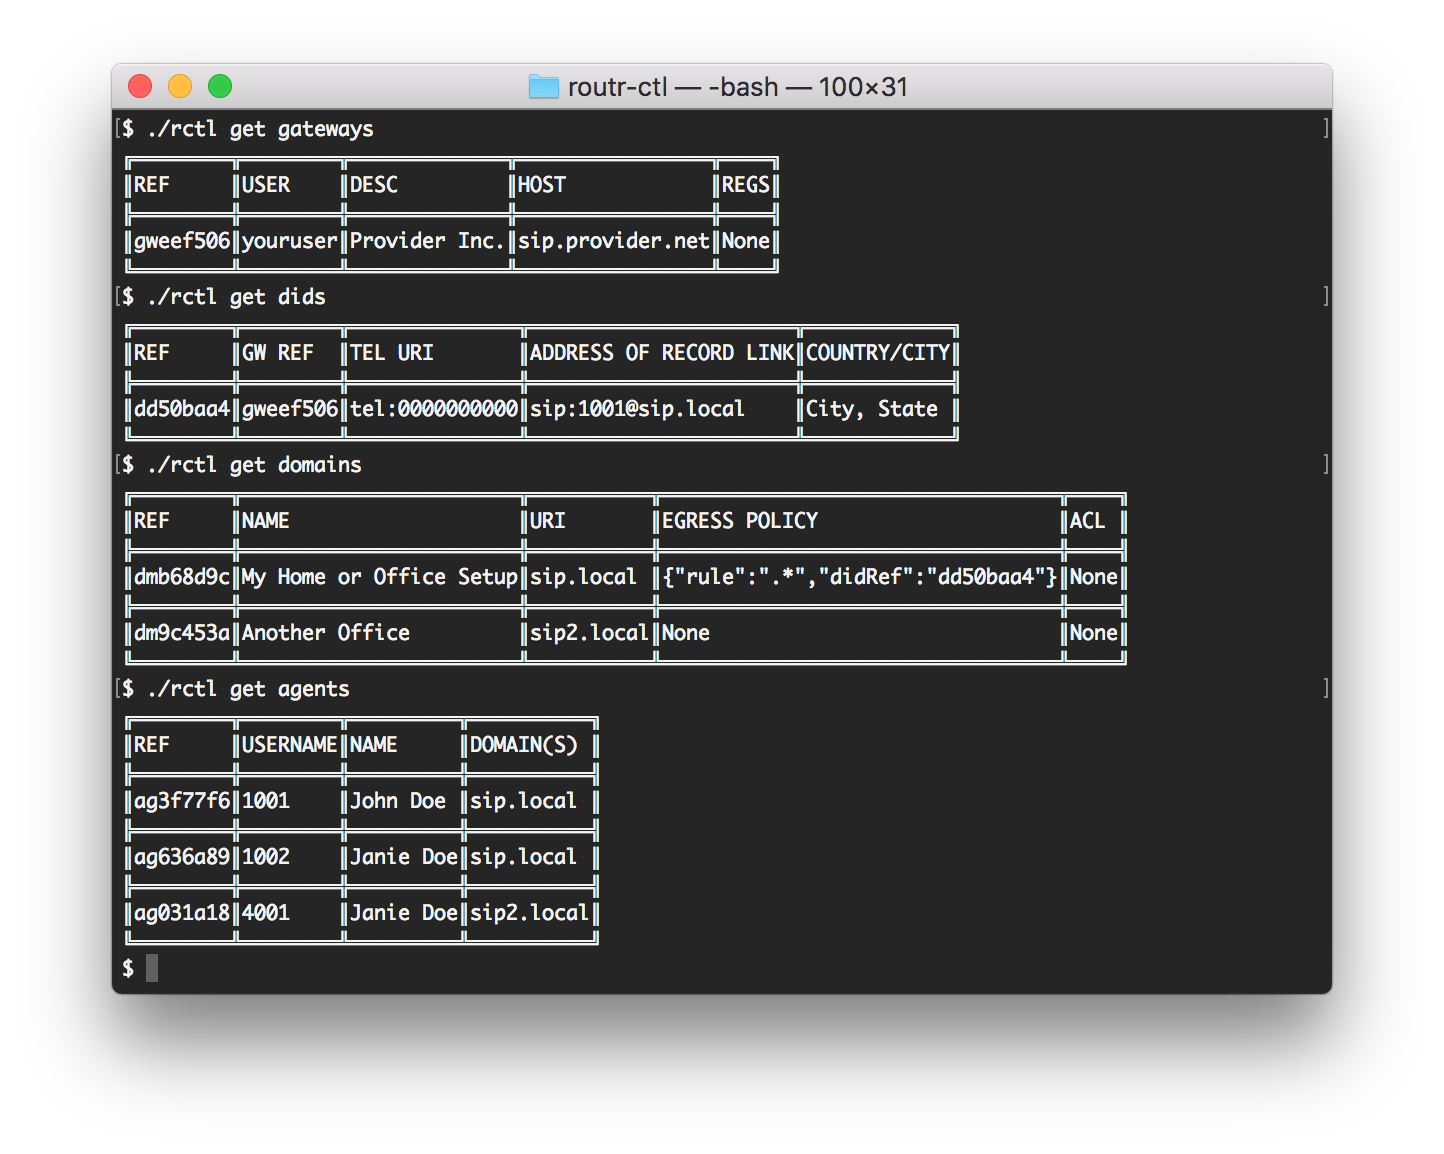
To verify your configuration, start the server by issuing the command routr. In a separate window, use the following commands:
rctl get gatewayrctl get numberrctl get domainrctl get agents
Your output should be as follows:
Starting the Server

Verifying the Configuration
Configuring the SIP devices
We are using "Telephone" for this example. You might use any softphone you wish, keep in mind that the configuration might look slightly different.
Configure your softphone using the information you gather in the last step. Start by completing only the required information: username, domain, password. Also, In the advanced section use the server's IP as your Registry Server and Proxy. Here is how mine looks like:

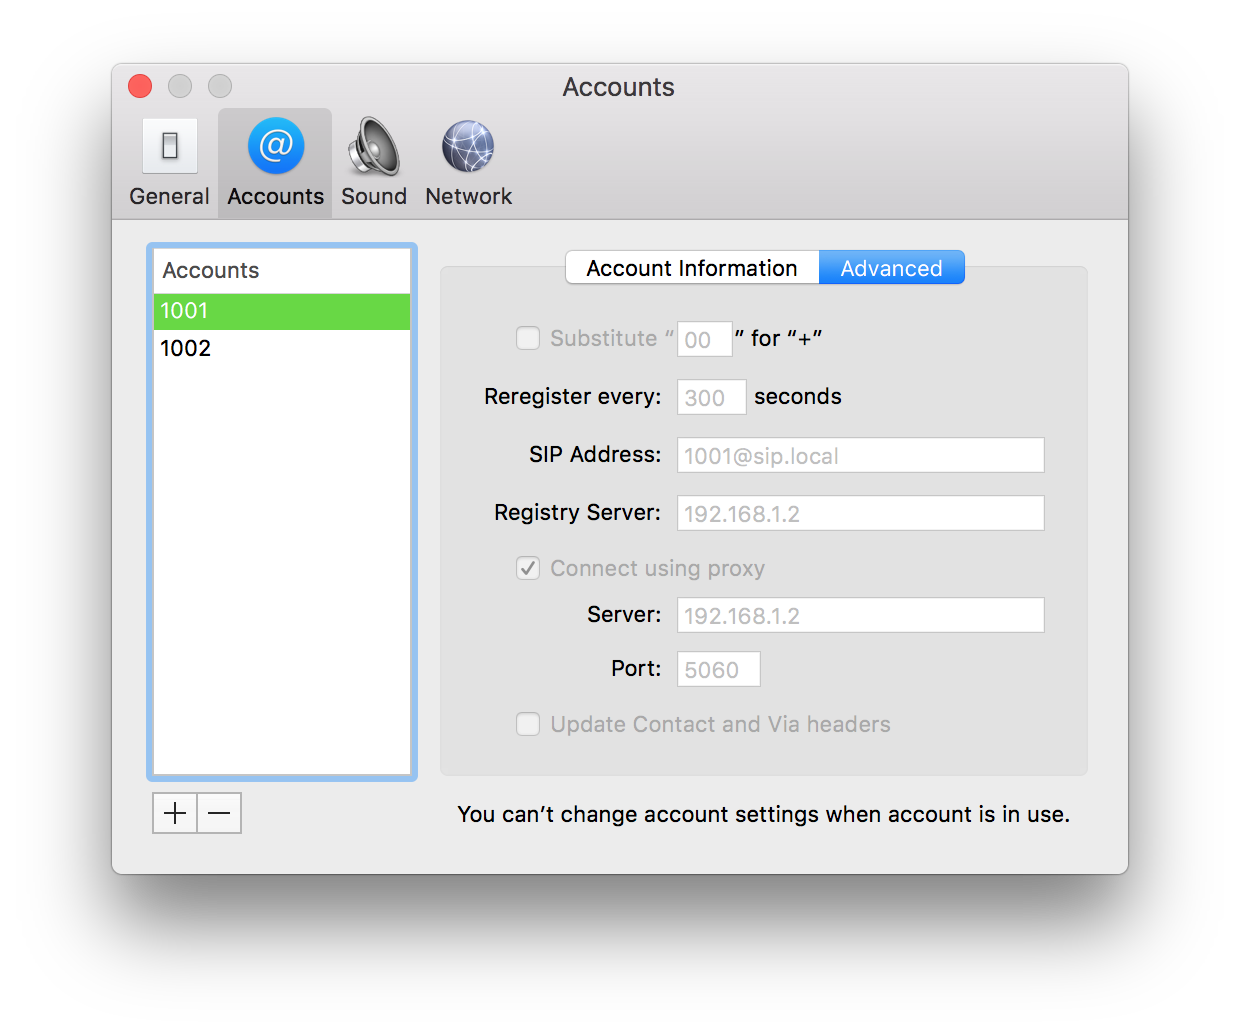
Make sure to check the box "Use this account" to register your device
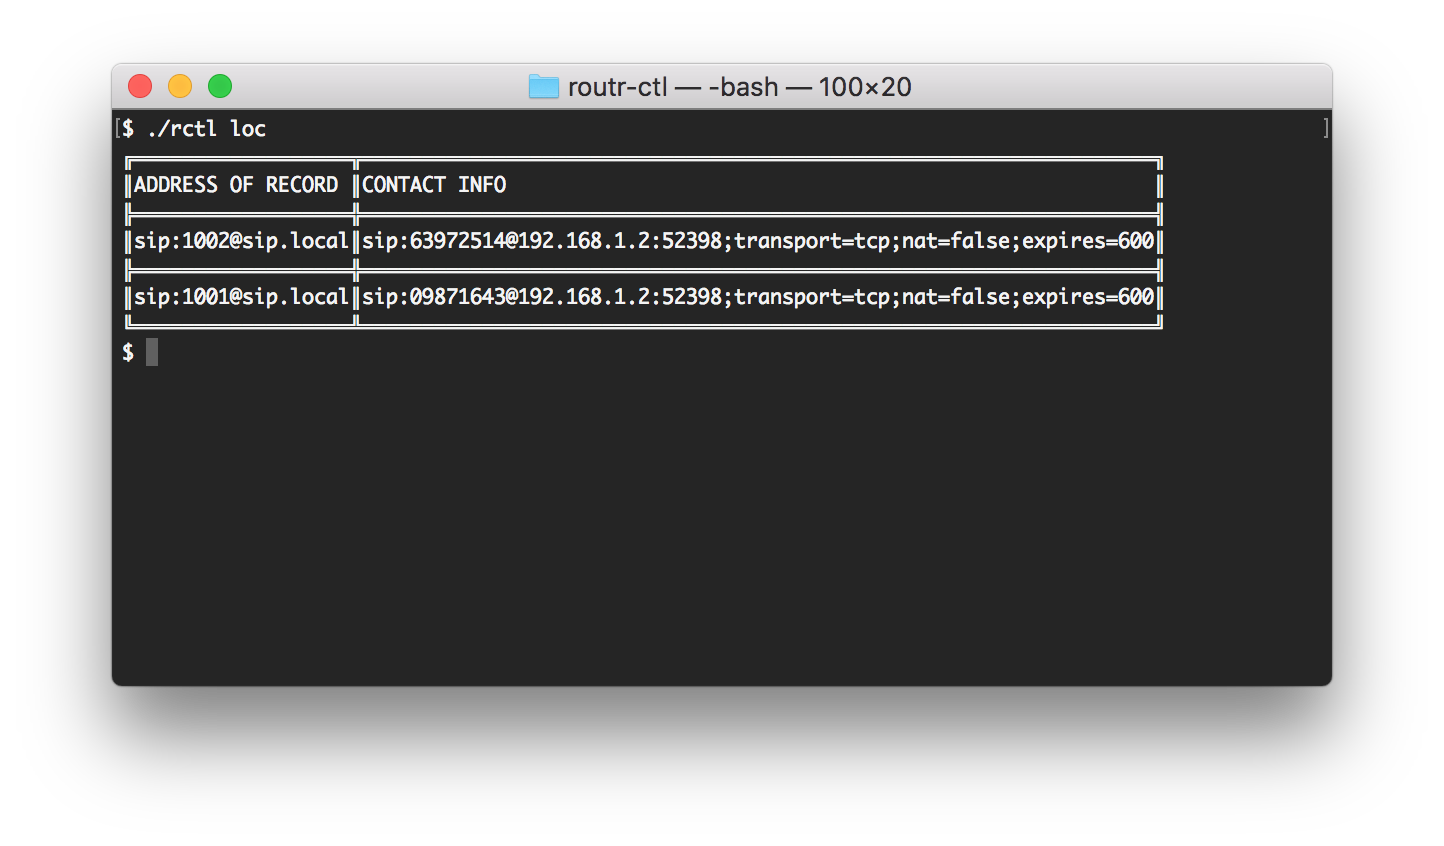
If everything went well, we only need to confirm that both softphones have registered correctly. Conveniently you can use the .rctl locate to obtain a list of registered devices. It may seem like much information. However, what's relevant here is that both 1001 and 1002 are present in the location service and therefore, can reach each other.
Making calls
The last step is easy. If everything went well, you are now able to call any device inside or outside your Domain. Use the destination URI (eg.: 1001@sip.local or 7853178060@sip.local).
What's Next?
You can check out the https://github.com/fonoster../wiki/Home to see more examples. If you have any questions, start an issue or contact us via:
- Twitter: @fonoster
- Email: fonosterteam@fonoster.com