Routr as Asterisk frontend
This guide explores the use case of using Asterisk merely as a Media Server and more specialized software, like Routr, to take care of the signaling and resource management. In other words, Asterisk is in charge of the IVR, voice mail, call recording, while Routr deals with connecting Agents, Peers, and Gateways. The following illustration depicts our scenario:

Content
- Requirements
- Configuration Overview
- Configuring Asterisk
- Calling Asterisk from John’s device
- What’s Next?
Requirements
This tutorial assumes the following:
- You have a SIP phone connected to the same LAN as Routr and Asterisk
- If using a hardware phone, this can reach Asterisk and Routr and the other way around
- You have a fresh installation of Routr and Asterisk
Before starting this guide make sure to have a fresh installation of Routr server.
Configuration Overview
With a fresh installation of Routr, you have most of the configuration you need to follow this tutorial. We, however, need to make some minor changes to configuration files to run our scenario.
The first file we need to examine and change is config/peers.yml. Make a note of the username and secret for the Peer "ast" since we are using this to configure Asterisk. Also, search for the field spec.device and change it to match the Agents domain(sip.local). The file now looks similar to this:
config/peers.yml
- apiVersion: v1beta1
  kind: Peer
  metadata:
    name: Asterisk PBX
  spec:
    device: 'sip.local'
    credentials:
      username: ast
      secret: '1234'
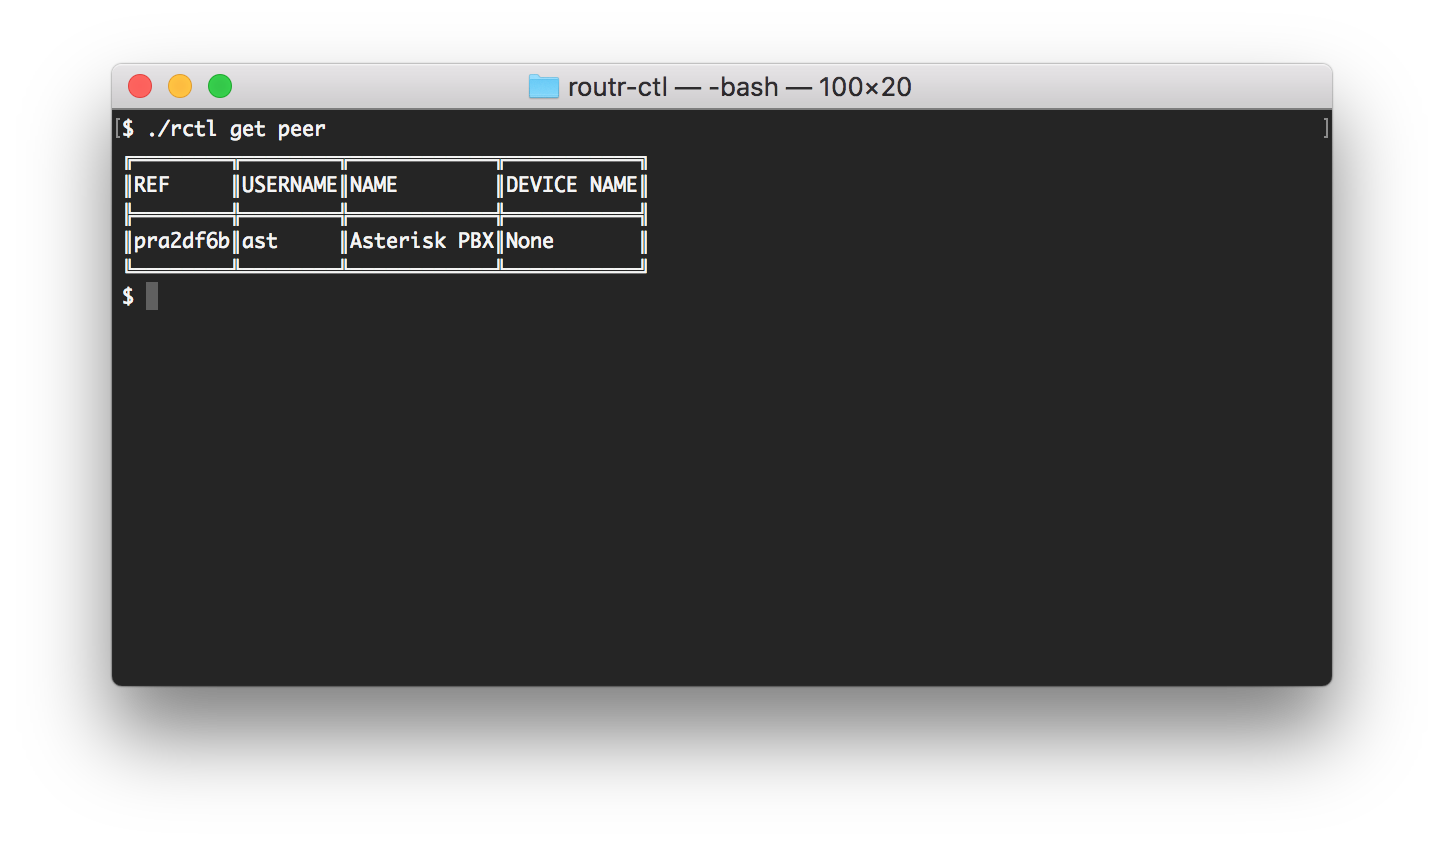
Head to the console and run the command rctl -- get peers to confirm that the Peer exist. The result should be as follows:
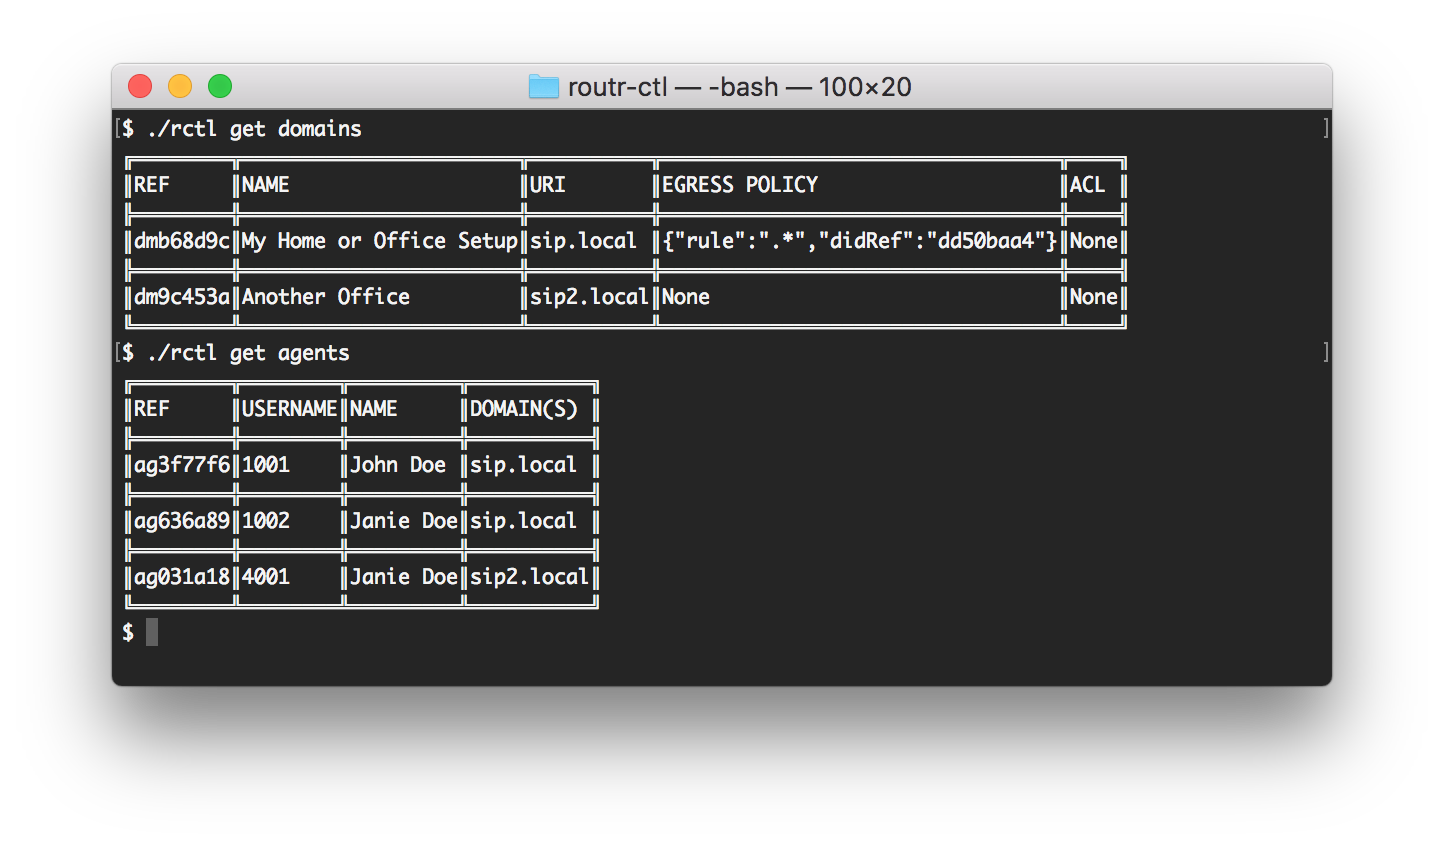
Next, we focus our attention on domains.yml and agents.yml. With a fresh installation, we don't need to make any changes to these files. However, you could run the commands get domains and get agents to ensure that both, the Agent and the Domain, exist on the server. Your output should look similar to:
Use the information in agents.yml to configure your SIP phone. The relevant information is found in spec.credentials. Mine looks like this:

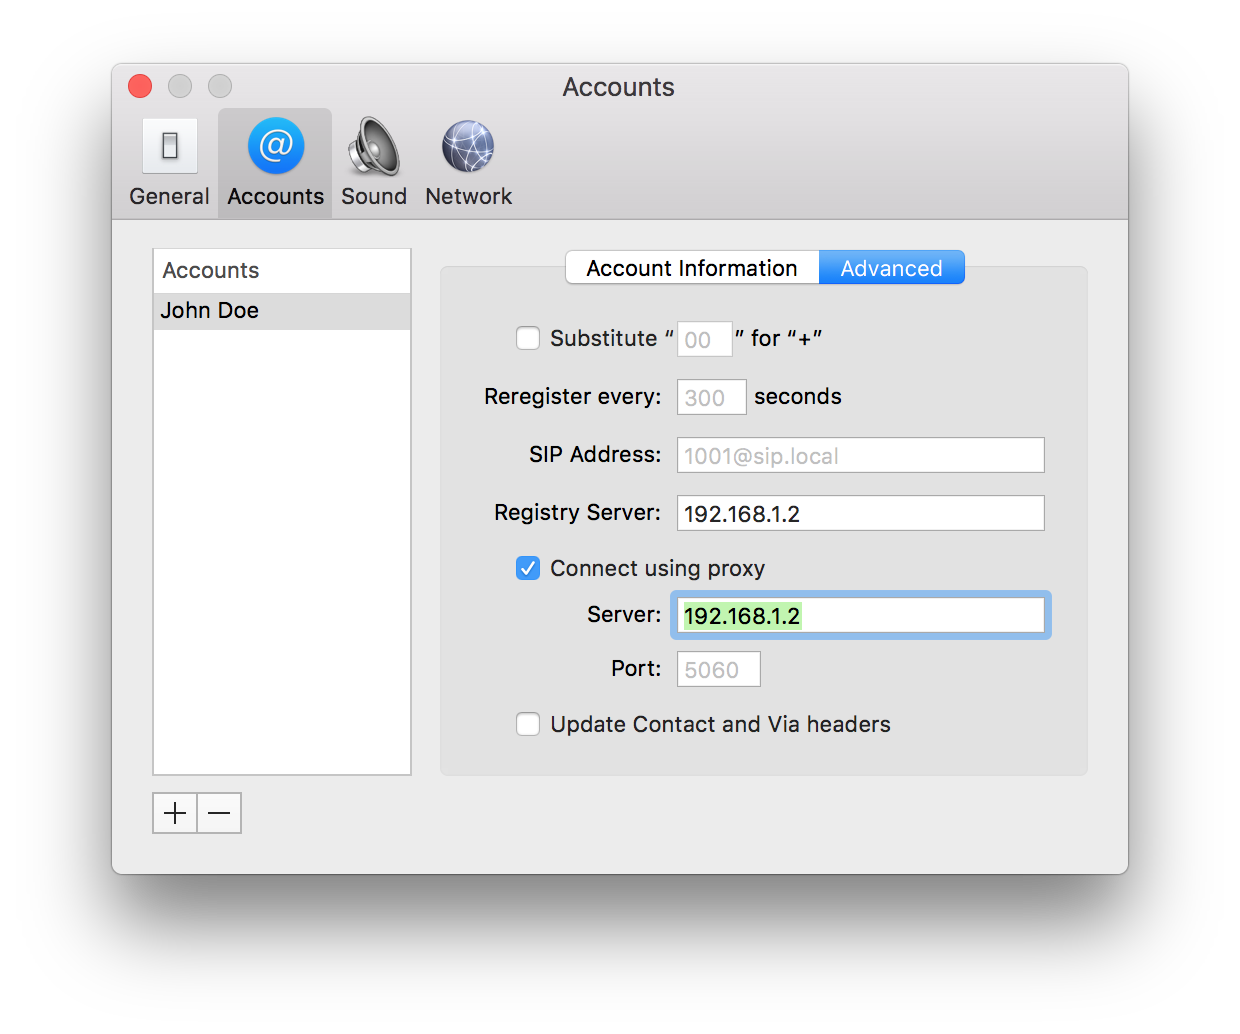
Make the adjustments based on your prefer SIP phone.
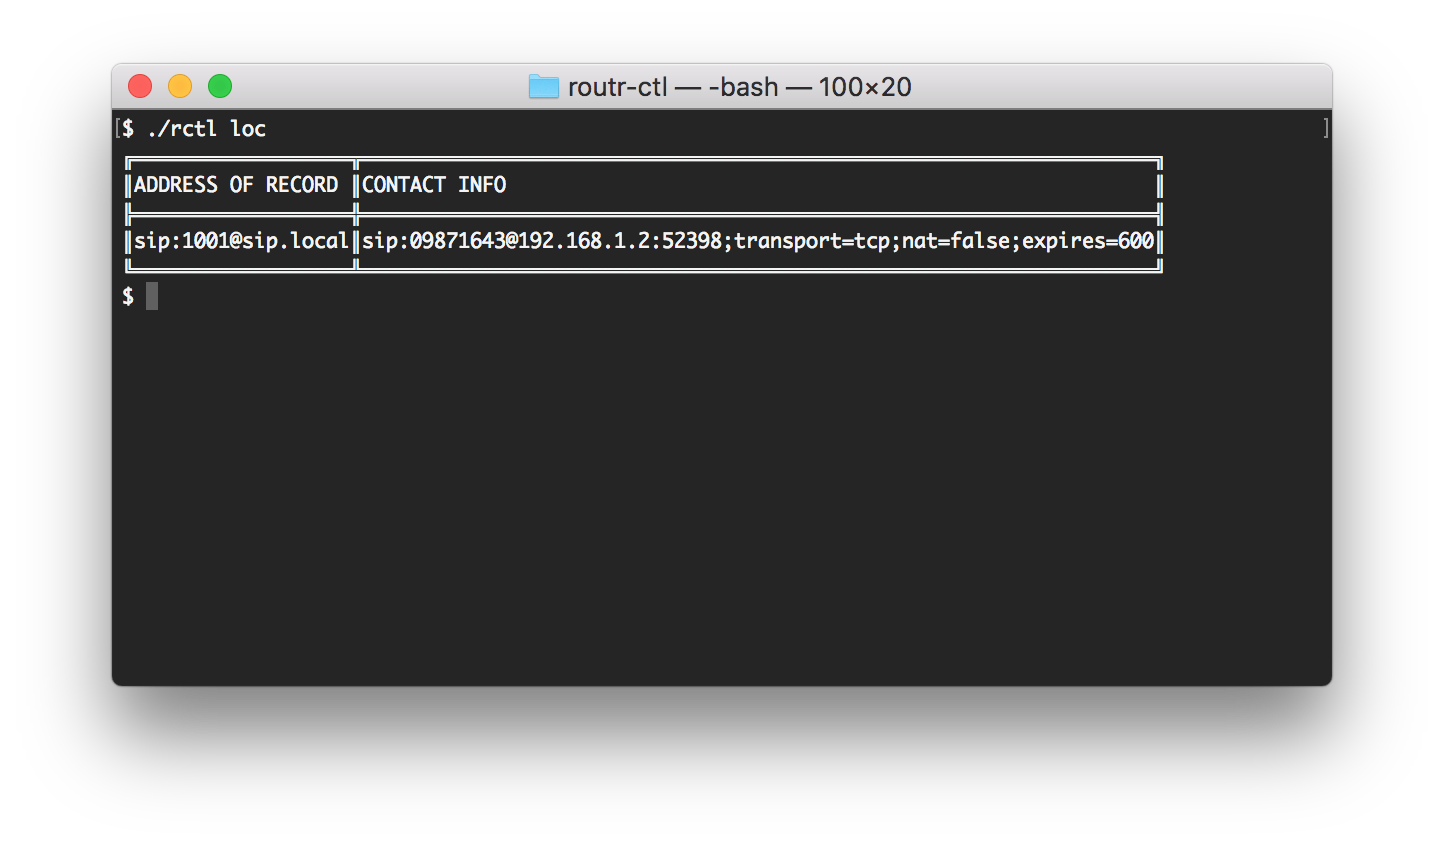
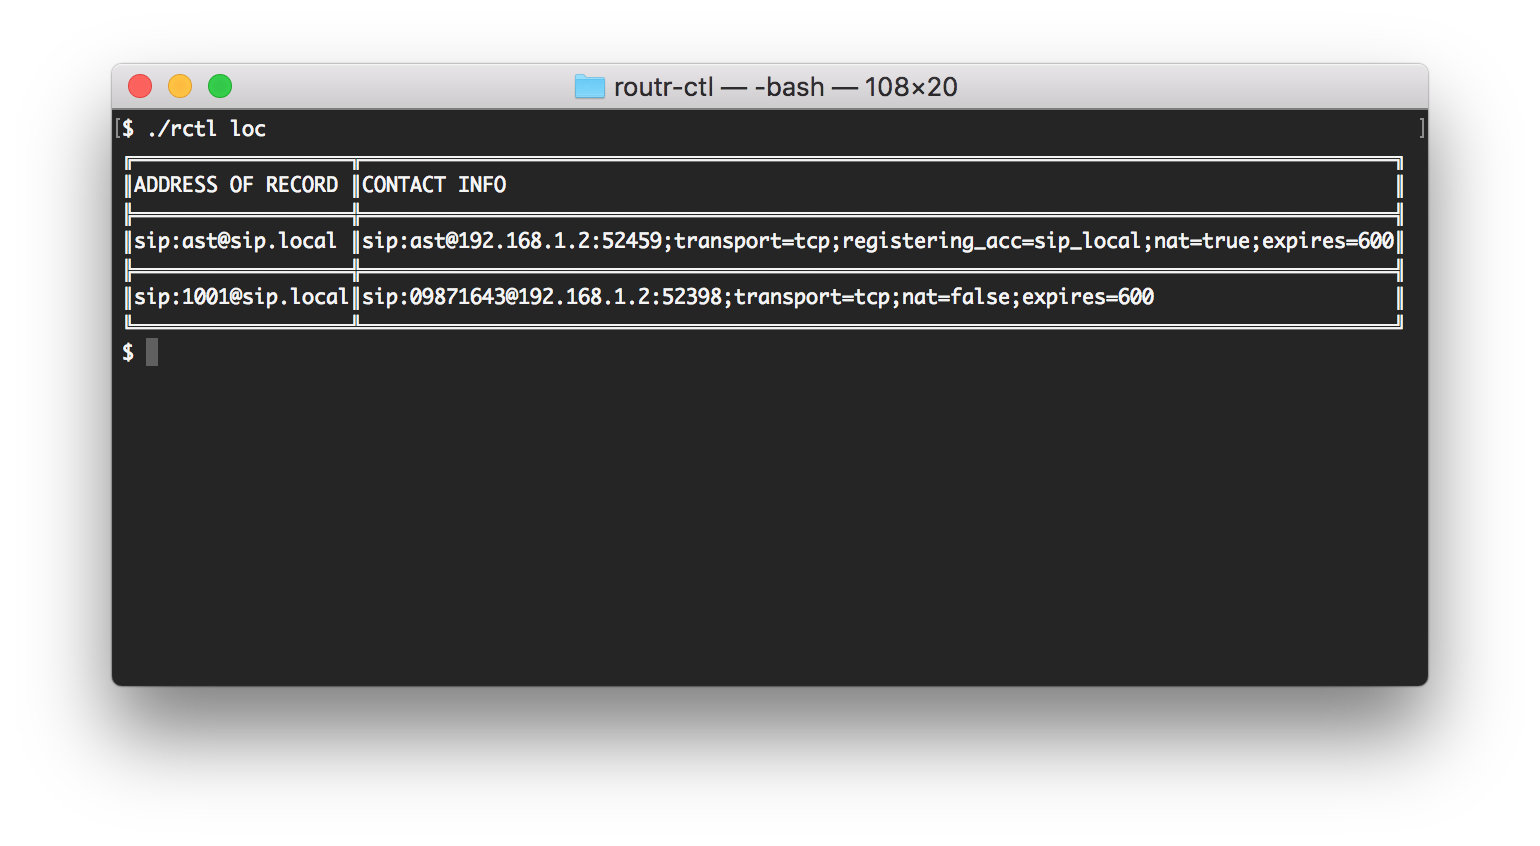
You can verify that your device registered correctly with Routr by running the locate command:
Configuring Asterisk
Using PJSIP
Backup your pjsip.conf and pjsip_wizard.conf. Update your pjsip.conf with the following:
[transport-tcp]
type=transport
protocol=tcp
bind=0.0.0.0:6060
Then, in your pjsip_wizard.conf:
[routr]
type = wizard
sends_auth = yes
sends_registrations = yes
remote_hosts = 192.168.1.2
outbound_auth/username = ast
outbound_auth/password = 1234
registration/retry_interval = 10
registration/expiration = 900
endpoint/allow = ulaw
endpoint/allow = alaw
endpoint/allow = opus
endpoint/context = default
transport = transport-tcp
Using the "old" Chan SIP
First backup your sip.conf. Then, replace your configuration and edit the file to reflect the following:
[general]
udpbindaddr=0.0.0.0:6060
context=default
register => ast:1234@192.168.1.2:5060/1001    ; This information must match the credentials in `config/peers.yml`
Configuring the Dialplan
We are going to use a very simple dialplan to play a sound file. Again, make a backup of your configuration and replace its content with this:
[default]
exten => 1001,1,Answer
exten => 1001,n,Playback(tt-monkeys)
exten => 1001,n,Hangup
Restart your Asterisk and check the location service. A new device now appears.
Calling Asterisk from John's device
We can now call ast@sip.local and if everything went well listen to a group of really annoying monkeys :).
What's Next?
You can check out the wiki to see more examples. If you have any questions start an issue or contact us via:
- Twitter: @fonoster
- Email: fonosterteam@fonoster.com